Ship Controller
Step-by-step Setup Guide for Ship Controller
Input
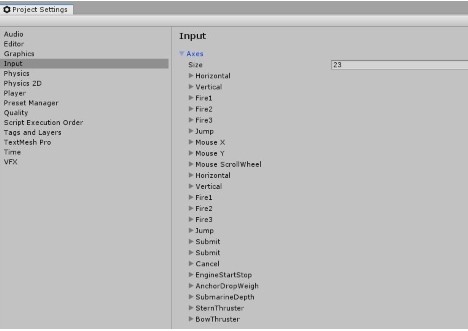
If you are using the legacy InputManager, a few input bindings need to be set up for everything to
work properly. These can be added under Edit => Project Settings =>
Input.
These are:
EngineStartStop(only positive button)AnchorDropWeight(only positive button)LeftThrottle(both positive and negative button)RightThrottle(both positive and negative button)SternThruster(both positive and negative button)BowThruster(both positive and negative button)SubmarineDepth(both positive and negative button)
If a function related to the input binding is not needed the binding can be skipped. E.g. if the submarine depth is not needed that input binding can be skipped.
Adding a Ship
For the example setup a primitive capsule will be used (GameObject menu
3D Object > Capsule).
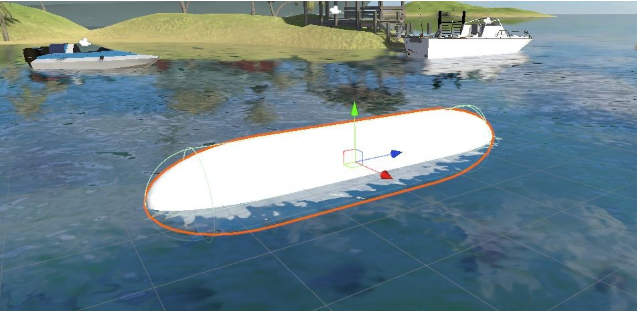
- Add the ship object into the scene and tag it
Ship(add a new tag if it does not exist). The tag is only necessary so that the ship changer can find your ship. - Add
WaterObjectWizardcomponent to the ship object. Tick the particle system option and click on Auto-Setup button. Click play - the object will float now. For manualWaterObjectsetup follow the guide here. - Add
AdvancedShipControllercomponent to the parent object (the one containing theRigidbody). - Add
CenterOfMasscomponent to the parent object and adjust center of mass to be near the bottom of the ship (green sphere). If this is not done the ship will most likely tilt to the side since the center of mass in Unity is calculated as a center of volume of all of the Rigidbody colliders, which is unrealistic for ships which generally have the center of mass near the keel. - Add the following Axes under Edit => Project Settings => Input if
they do not already exist.
EngineStartStop(only positive button)AnchorDropWeight(only positive button)SubmarineDepth(both positive and negative button)LeftThrottle(both positive and negative button)RightThrottle(both positive and negative button)SternThruster(both positive and negative button)BowThruster(both positive and negative button)
Rudders
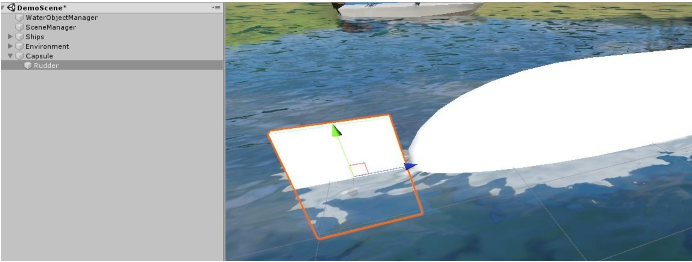
- Add a rudder (in this case just a scaled cube) to the ship.
- Assign the rudder transform (in this example the scaled cube) to the
Rudder Transformfield under Rudders foldout. - Add
WaterObjectcomponent to the rudder so it too can interact with water. - Add a
Cameraof any type to the ship object (as a child) and tag itShipCamera. - Press play and cycle to your ship using the
Vbutton (default change ship button). The boat is now floating and the rudders turn. If the rudders turn around wrong axis the rotation of the model needs to be fixed. Check the Fixing Model Rotation guide for instructions on how to fix the model rotation.
Engines
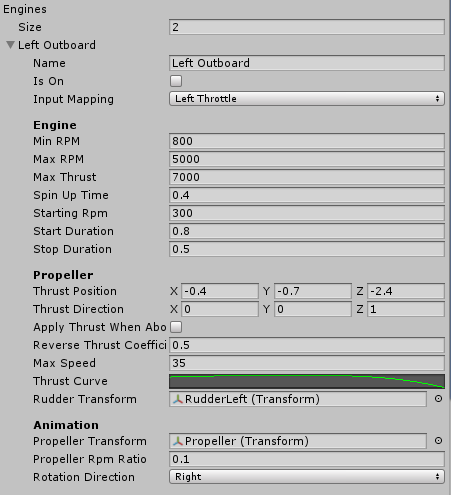
- To make ship move an engine and propeller are needed. Ship
Controller assumes that there is one propeller per engine. Add an
engine under Engines tab and set the wanted values (hover over each
value to see what it does). If thrust position is above the water
thrust will not be applied (if
Apply Thrust When Above Wateris left unchecked).
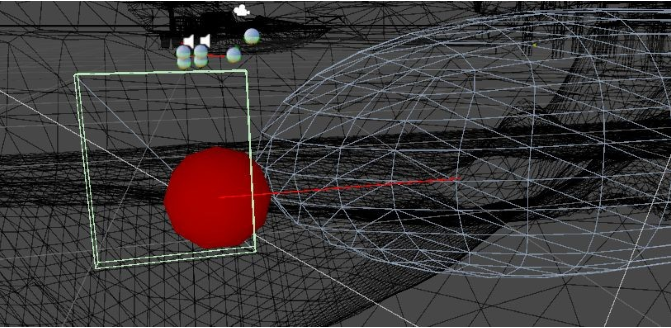
Thrusters
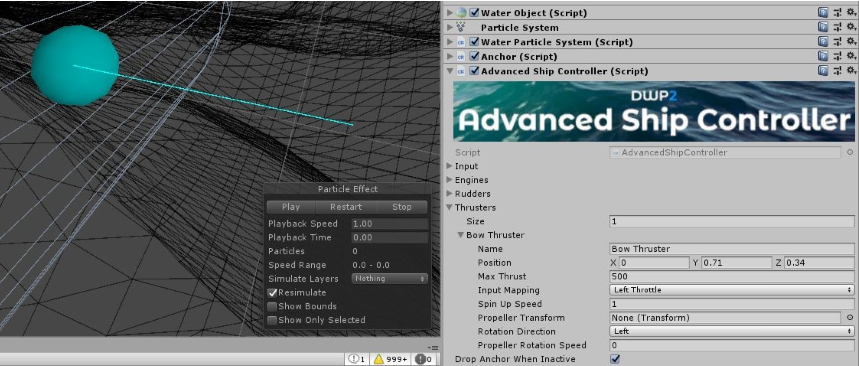 Larger ships usually have bow and/or stern thrusters to help them
maneuver. Thruster is indicated as a blue sphere with a line
indicating direction of thrust when positive input is pressed.
Larger ships usually have bow and/or stern thrusters to help them
maneuver. Thruster is indicated as a blue sphere with a line
indicating direction of thrust when positive input is pressed.
Sound
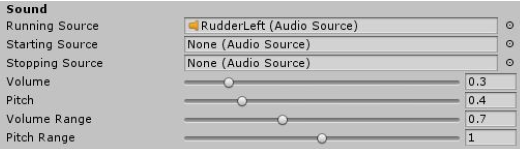 Engine sound is achieved through simple pitch modulation. To set up
sound:
Engine sound is achieved through simple pitch modulation. To set up
sound:
- Add an
AudioSourceto the ship object and assign a looped engine sound clip to it. Drag theAudioSourceto the fieldRunning Sourceunder Engine foldout. - Same should be done for
Starting SourceandStopping Sourcefields. These fields are options. Adjust theStart DurationandStop Durationfields to be somewhat shorter than the length of starting and stopping clips.