Input
Note: The Input System is part of NWH Common. For detailed information about input providers, architecture, and creating custom providers, see NWH Common - Input System.
- Ships retrieve user input through
Inputclass which retrieves input from activeInputProviderand fills theInputStatesstruct with the retrieved data. *InputProviders are split into ShipInputProviders and SceneInputProviders. ShipInputProviders relay ship input (throttle, brakes, etc.) while SceneInputProviders take care of scene input (ship changing, camera changing, camera movement and the rest of the inputs not directly related to ship. One of each needs to be present (e.g.InputSystemShipInputProviderandInputSystemSceneInputProvider). - Multiple different
InputProviders can be present in the scene (v1.0 or newer required). E.g. InputSystemProviders and MobileInputProviders can be used in the same scene. The resulting input will be a sum of inputs from allInputProviders in case of numeric inputs and logical OR operation of all inputs in case of boolean inputs. - Input is stored inside
InputStatesobject and can be copied over from one ship to another. - To manually set the
InputStatesmake sureAuto Settableis set to false.
All input providers inherit from either ShipInputProviderBase or
SceneInputProviderBase, but differ in their implementation.
Input System Warning
When importing the asset for the first time this message will pop up:
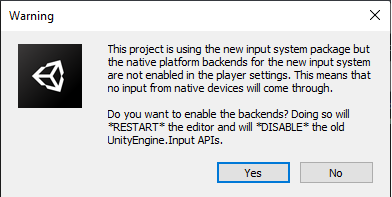
Select Yes to enable the new Input System.
The demo scenes rely on InputSystem.
If a message This Unity Package has Package Manager dependencies.
appears, click Install/Upgrade.
Available Bindings
Ship Input Provider Bindings
Warning: Out of the box gamepad bindings are only available for InputSystem.
| Name | Type | Keyboard Defaults | Gamepad Defaults | Description |
|---|---|---|---|---|
Steering |
axis [-1,1] | A/D | Left Stick - Left/Right | Steering/rudder. Positive right. |
Throttle |
axis [-1,1] | S/W | Left/Right Trigger | Throttle. Positive forward. |
Throttle2 |
axis [-1,1] | Throttle 2. | ||
Throttle3 |
axis [-1,1] | Throttle 3. | ||
Throttle4 |
axis [-1,1] | Throttle 4. | ||
BowThruster |
axis [-1,1] | Q/E | Left Stick - Left/Right | Bow thruster input. |
SternThruster |
axis [-1,1] | Z/C | Stern thruster input. | |
SubmarineDepth |
axis [-1,1] | K/I | ||
EngineStartStop |
Button | E | ||
Anchor |
Button | T |
Scene Input Provider Bindings
| Name | Type | Keyboard Defaults | Gamepad Defaults | Description |
|---|---|---|---|---|
ChangeCamera |
button | C | Start | Changes camera. |
CameraRotation |
2D axis | Mouse Delta | Right Stick | Controls camera rotation. |
CameraPanning |
2D axis | Mouse Delta | Right Stick | Controls camera panning. |
CameraRotationModifier |
button | Mouse - LMB | Right Stick Press | Enables camera rotation. |
CameraPanningModifier |
button | Mouse - RMB | Left Stick Press | Enables camera panning. |
CameraZoom |
axis | Mouse - Scroll | D-Pad Up/Down | Camera zoom in/out. |
ChangeVehicle |
button | V | Select | Change vehicle or enter/exit vehicle. |
FPSMovement |
2D axis | WASD | Left Stick | Demo FPS controller movement. |
ToggleGUI |
button | Tab | Toggles demo scene GUI. |
Input Manager (old/classic)
- Type of
InputProviderfor handling user input on desktop devices through keyboard and mouse or gamepad. - Uses classic/old Unity Input Manager. It is recommended to use the Unity's new Input System instead for new projects.
Note: InputSystem package is required. The old/classic Unity
InputManageris no longer supported.
Installation
When first importing Dynamic Water Physics 2 the project will be missing required bindings. There are two ways to add those:
- Manually adding each entry to the Project Settings => Input following the input bindings table.
- Copying the contents of InputBindings.txt and appending them to
the contents of the
[UnityProjectPath]/ProjectSettings/InputManager.assetfile. To do so:- Close Unity.
- Open InputManager.asset in Notepad/Notepad++/Visual Studio or any other text editor of your choice.
- Copy the contents of the provided InputBindings.txt file (Scripts => ShipController => Input => InputProviders => InputManagerProvider => InputBindings.txt) and paste them at the end of the InputManager.asset. Make sure there are no empty lines between the existing content and the pasted content. Also make sure that all the indents are correct (Unity will detect end of file if indent is off). Save the file.
- Open Unity. Check Project Settings => Input. The input bindings for Dynamic Water Physics will appear towards the bottom of the list.
Scene Setup
To set up InputManager-based input in the scene add the following components to the scene:
- ‘InputManagerShipInputProvider’
- ‘InputManagerSceneInputProvider’
Any ship that is present in the scene will now receive input from these providers.
Input System (new)
- InputSystem v1.0 or higher is required. This is available in Unity 2019.3 or newer.
Warning: When using DS4Windows, InputSystem will detect button presses twice.
Installation
- Install 'Input System' package through Window => Package Manager
- Under Edit => Project Settings => Player => Other Settings, set
Active Input HandlingtoInput System Package (New)orBoth- the latter in case your project still usesUnityEngine.Inputsomewhere.
Scene Setup
- Add
InputSystemShipInputProviderandInputSystemSceneInputProviderto any object in your scene. - Default bindings can be modified by double clicking on
.inputactionsfiles.Save Assetmust be clicked for the changes to take effect.
Mobile Input Provider
- Add
MobileShipInputProviderandMobileSceneInputProviderto the scene. - Create a few UI => Button objects inside your canvas. Make sure that they are clickable.
- Remove the
UnityEngine.UI.Buttoncomponent and replace it withMobileInputButton.MobileInputButtoninherits fromUnityEngine.UI.Buttonand addshasBeenClickedandisPressedfields which are required forMobile Input Provider - Drag the buttons to the corresponding fields in the
MobileShipInputProviderandMobileSceneInputProviderinspectors. Empty fields will be ignored.
Scripting
Retrieving Input
Since v1.0 multiple InputProviders can be present in the scene,
meaning that their input has to be combined to get the final input
result. To get the combined input use:
float throttle = InputProvider.CombinedInput(i => i.Throttle());
bool engineStartStop = InputProvider.CombinedInput(i => i.EngineStartStop());
Or to get the input from individual InputProviders (say to find out
if a button was pressed on a keyboard):
float throttle = InputProvider.Instances[0].Throttle;
When using input generated by code (i.e. AI) it is usually handy to have access to a single axis throttle/brake. This can be done like so:
shipController.input.Throttle = 0.5f;
shipController.input.Throttle = -0.5f;
Warning:
shipController.input.states.throttleis equal toshipController.input.Throttle. The latter is just a getter/setter for convenience.
Manually Setting Input
Input in each ship is stored in InputStates struct:
myShipController.input.states
In case input should not be retrieved from user but from another
script - as is the case when AI is used - AutoSettable should be set
to false. This will disable automatic input fetching from the active
InputProvider.
Input now can be set from any script:
myShipController.input.Horizontal = myFloatValue; // Using getter/setter.
myShipController.input.states.horizontal = myFloatValue; // Directly accessing states.
Custom InputProvider
If a custom InputProvider is needed it can easily be written. Custom
InputProviders allow for new input methods or for modifying the
existing ones. E.g. if the MobileInputProvider does not fit the needs
of the project a copy of it can be made and modifications done on that
copy. That way it will not get overwritten when the asset is updated.
Steps to create a new InputProvider:
- Create a new class, e.g.
ExampleInputProviderand make it inherit fromInputProviderclass:
public class ExampleInputProvider : InputProvider {}
- Implement missing methods. Most IDEs can do this automatically.
- The required methods are abstract and will need to be implemented.
There are also virtual methods such as
ToggleGUI()which are optional and will be ignored if not implemented. - Methods that are not used should return
false,0or-999in case ofShiftInto()method.