Quick Start
This guide explains how to set up a primitive sphere to interact with water. An empty scene will be used for the example.
Sample Prerequisites
Before starting with NWH Dynamic Water Physics 2, import the required samples:
Important
NWH Common Package > Common Base Sample must be imported first. This sample is required for all NWH package samples to function properly.
Samples are imported via Package Manager > In Project > NWH Dynamic Water Physics 2 > Samples.
Note
Samples are found in the Package Manager under the "In Project" category in the left sidebar, NOT under "My Assets" or other categories.
The Base Sample contains the main demo scene and is required before importing other Dynamic Water Physics samples (Multiplayer, water integration samples).
Water Object
Warning: If making an open-world game with a large-scale map (> ~4000 units), the floating origin is required (not only for this asset, but in general with game engines that use floating point precision). See floating origin explanation.
Any physics object that is active and has WaterObject attached will
interact with water. There are two requirements for WaterObject to
work: a Rigidbody and a MeshFilter:
MeshFilteris required so that theWaterObjectknows which mesh to use for simulation.Rigidbodydoes not have to be attached to the same object asWaterObject, but it must be present in one of its parents. This allows for composite objects; one Rigidbody with multiple hulls - such as a trimaran.
Example Manual Setup
- Add a 3D Object > Sphere to the scene.
- Add a
Sphere Colliderto the Sphere if not automatically added. - Add a
Rigidbodyto the Sphere and set its mass to 300. There is also a script calledMassFromMaterialwhich can calculate and set theRigidbodymass based on material density and mesh volume, but it is a helper script and not required. - Add
WaterObjectto the Sphere. Since the sphere by default has 768 triangles theSimplify Meshoption should be used. This option automatically decimates the mesh to aTarget Triangle Count. A good triangle count is 30 or less for simple objects and around 60 for ship hulls. Using higher triangle count will have a linear performance penalty with minimal quality gain. For the example sphere, 36 is sufficient.
Example Auto Setup
- Add a 3D Object > Sphere to the scene.
- Attach
WaterObjectWizardto the sphere and press Auto-Setup.
Center Of Mass
Center of Mass is one of the most important settings for a ship. A ship with too high center of mass will capsize. Center of Mass can be adjusted by unticking the automatic center of mass on the Rigidbody and adjusting the values there. Lower Y value will make the ship more resistant to capsizing, but setting it below the keel will make the ship lean into the corner instead of away from it.
Water Data Provider
WaterDataProvider is a script that tells WaterObject where the water is.
It is an interface between water systems/assets and DWP2. All flat water assets/shaders use the same
WaterDataProvider: FlatWaterDataProvider, while for wavy assets such
as Crest, an asset-specific WaterDataProvider has to be used, e.g.
CrestWaterDataProvider. The WaterDataProvider can be added to any GameObject in the scene.
Multiple water surfaces can be used in the same scene by attaching a Collider with
isTrigger = true to the WaterDataProvider. As long as the object is
inside the trigger, it will use data from that WaterDataProvider.
Minimal Setup
- Add a Cube (or any other mesh) to the scene.
- Attach
WaterObjectto the Cube. Make sure that a Rigidbody has been added. - Press Play. The object will now float at default water height (set
under
WaterObjectsettings).
Adding Water
FlatWaterDataProvidercan be used to make water height follow a flat primitive plane.- For more info and 3rd party asset integration check the Water Assets page.
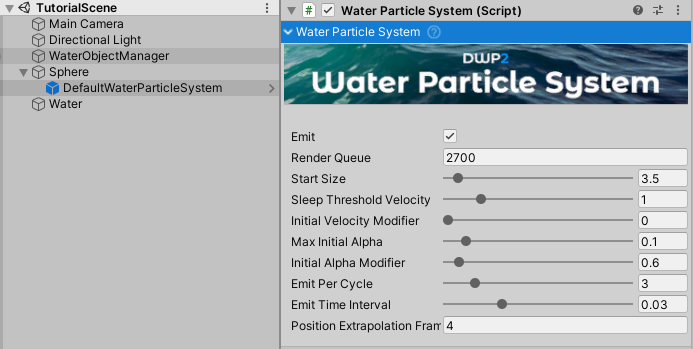
Water Particle System
WaterParticleSystem can be used to generate foam. It works with any
flat water.
- Drag DefaultWaterParticleSystem from DWP2 => Resources into the
scene and parent it to the Sphere.
- Move the Sphere above the water and press play. The sphere falling
into the water will generate foam around it based on simulation
data.
WaterParticleSystemandParticleSystemvalues can be tweaked to suit the needs of the project.
Water Object Wizard
WaterObjectWizard is a helper script that sets up a WaterObject automatically. It is still recommended to have knowledge of manual setup and how things work, but this script can automate and speed up the setup process. A primitive Sphere will be used, same as in the manual setup section above.
- Add a 3D Object > Sphere to the scene.
- Add
WaterObjectWizardto the newly created Sphere. - Tick Add Water Particle System (optional). This option is self-explanatory.
- Click
Auto-Setupand press Play after the setup is done. The Sphere now floats and generates foam. Next step would be to manually check and tweak the default values, such asTarget Triangle Count, center of mass, etc.