NWH Common Scripts
These scripts are shared between NWH Vehicle Physics 2, Dynamic Water Physics 2 and NWH Aerodynamics. They are included through the NWH Common package.
Changing cameras

CameraChanger inspector.
CameraChangeriterates over all theCameras in theVehicleCameras list and makes sure that only one camera is active at one time.- It can work with any camera script, not only the ones included with the asset. This includes e.g. Cinemachine cameras.
Setup
- Attach
CameraChangercomponent to the Cameras object. This should be an empty object that is a child of vehicle root. - Tick
Auto Find Camerasor manually assign cameras to theVehicle Cameraslist. IfAuto Find Camerasis enabled it is important that all the cameras are placed as children of the object containingCameraChangerscript or otherwise they will not be auto-detected. - Cameras can be changed by pressing
C(default value). Check Input Setup for more info.
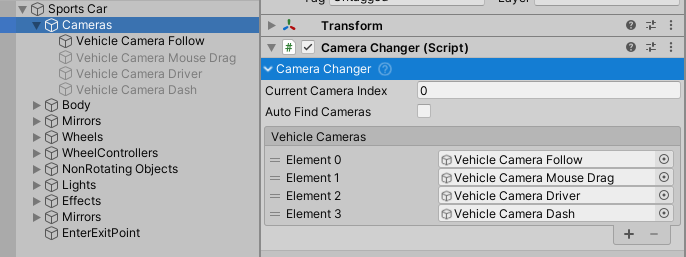
Example CameraChanger setup.
Interior cameras
A script that can be attached to any Camera. It tells the vehicle if the camera is inside the vehicle. If it is, low pass filter is applied to imitate the muffled sounds inside the vehicle.
Attach it to an interior camera within the vehicle hierarchy. CameraChanger uses it when switching views; the sound manager can then apply the configured interior attenuation and low-pass filter.
Following the vehicle
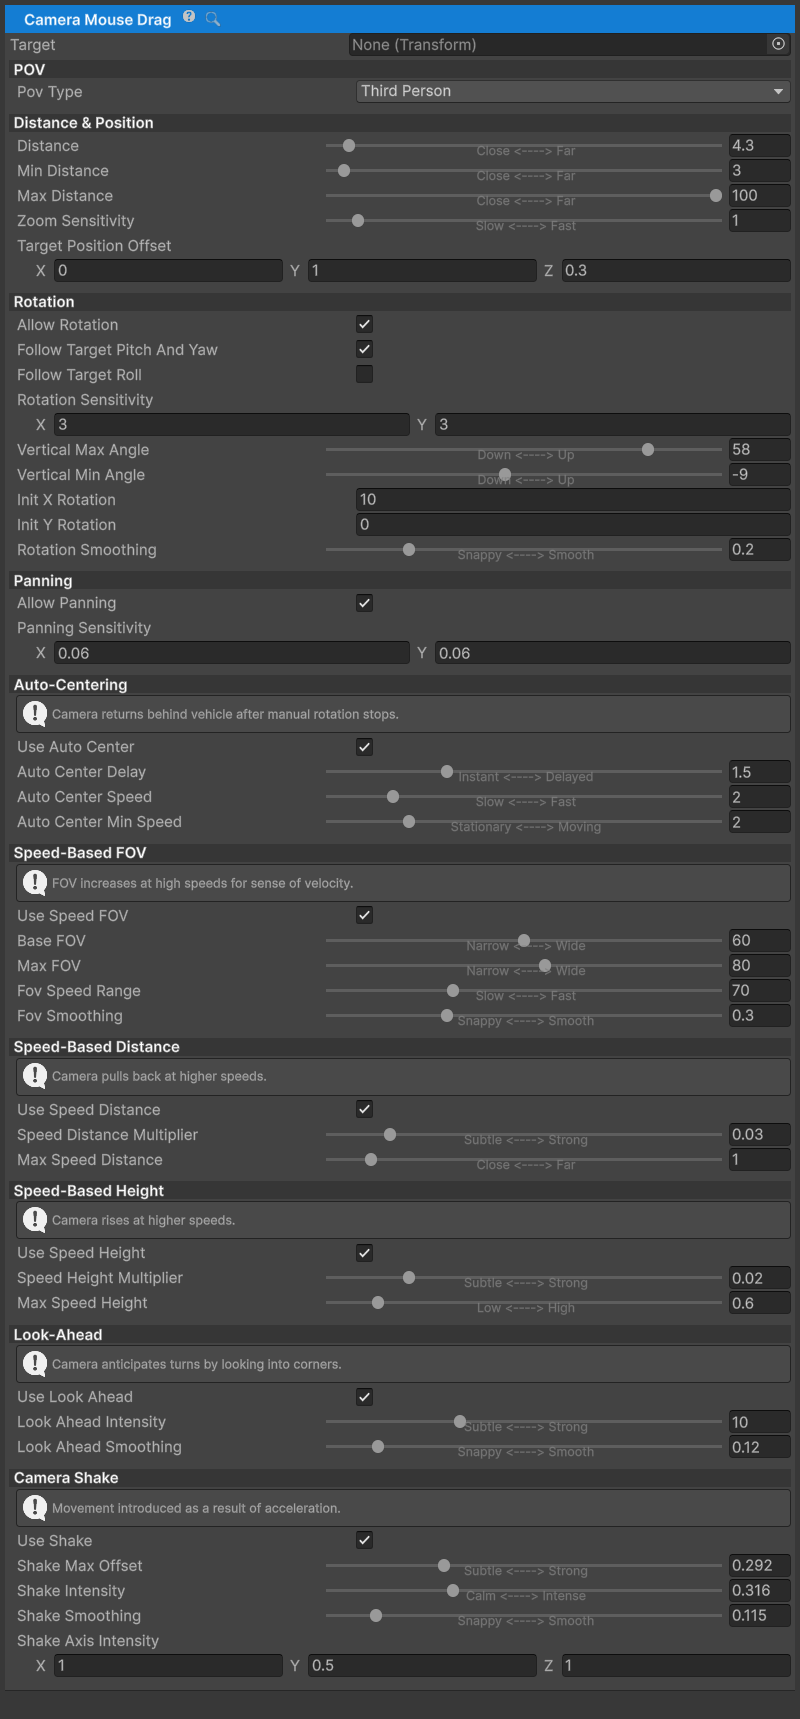
The default camera script. Can be used for both 1st and 3rd person.
A type of
VehicleCamera.Attach to any
Cameraand assignTargetthat the camera will follow. If left empty theCameraMouseDragwill auto-find target VehicleController.Camera can be rotated using LMB, zoomed in-out using the mouse wheel and panned using RMB.
Select first- or third-person mode to suit the camera. Third-person settings also provide automatic centering, speed-dependent distance and field of view, and look-ahead. Tune the basic target, distance and rotation first, then add these effects.
Center of mass and inertia
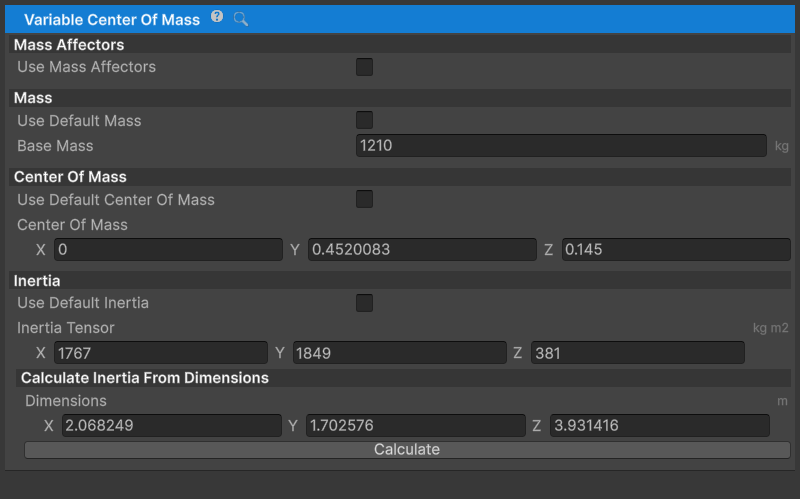
VariableCenterOfMass inspector.
Note
This is a common script shared between all the vehicle focused NWH assets.
Note
In Unity 6, center of mass and inertia can be adjusted directly in the Rigidbody inspector. This component is useful when you also need mass affectors or runtime changes.
Adds an option to adjust the center of mass and inertia tensor of the vehicle Rigidbody through the inspector. In Unity 2023 and newer this can be done through the Rigidbody inspector.
- It also has a
MassAffectorfeature where the mass, center of mass and inertia can be impacted byMassAffectors attached to the vehicle. This can be a fuel tank, a piece of cargo, a player, etc.MassAffectors, despite affecting the Rigidbody properties, are notRigidbodies. This allows for things like cargo to affect the vehicle, without having the overhead of Rigidbody collisions/joints/etc. VariableCenterOfMassis designed to give users more control over the Rigidbody which is usually needed for use with vehicles. This is because Unity assumes all objects/colliders have uniform density and therefore calculates the center of mass and inertia using that assumption. This script allows for tweaking of both of these values to better fit the specific vehicle. Center of mass and inertia tensor, besides mass, have the biggest effect on vehicle handling.- The variable part of the name comes from the ability of the script to adjust the mentioned parameters at runtime through
IMassAffectors. There are components attached to different parts of the vehicle that affect the vehicle mass, the center of mass, and inertia but are not Rigidbodies by themselves. Examples of this would be fuel tanks, passengers, cargo, etc.
Usage
- Attach the
MassAffector(or any script implementingIMassAffector) to aGameObjectthat is a child of the vehicle. - Tick
Use Mass Affectorson theVariableCenterOfMasscomponent. - Untick the
Use Default ...for the properties that theMassAffectors should affect.
Call MarkDirty() after moving a load or changing its mass so the component recalculates the Rigidbody properties on the next physics update. For full shared-system settings, see the Common manual.
Mass affectors
IMassAffector is an interface that can be implemented by a MonoBehaviour to provide its mass, world center of mass and transform. If attached as a child (it does not need to be a direct child) this script will modify the parent Rigidbody mass, center of mass and inertia through its mass and position relative to the Rigidbody.
Any values visible in the VariableCenterOfMass are displayed without the additional weight of the IMassAffectors and only in play mode do these get applied. The VariableCenterOfMass will iterate over child IMassAffector, calculate the new values and apply them to the Rigidbody when its settings or mass contributions change, or when MarkDirty() is called.
Default implementation is MassAffector which includes all the base fields.
Shifting origin
A simple shifting origin script. Moves all objects in the scene to keep the player near the origin once the distance exceeds the Distance Threshold.
Shifting origin is a commonly used technology in most open-world games to combat the degradation of the quality of physics and visuals far from the origin (~1000 units or more). Unity uses single-precision floats for positions, with roughly seven significant decimal digits. When the distance is large only a limited number of the digits is available on the right side of the decimal point. That means that at ~100km from the origin the spacing between representable positions is about 8 mm! By moving the object back to [0, 0, 0] each time that the object gets too far away from the origin, and also moving the whole world with it for the same amount, an illusion of travelling great distances is formed while the player never gets further than some threshold from the origin.
Add one ShiftingOrigin to the scene. It follows Camera.main and shifts roots in the loaded scenes when the distance threshold is reached. Call RefreshCaches() after adding Rigidbodies or particle systems at runtime. Systems that store their own world positions need to respond to onBeforeJump / onAfterJump; TotalOffset records the accumulated correction.
Changing vehicles
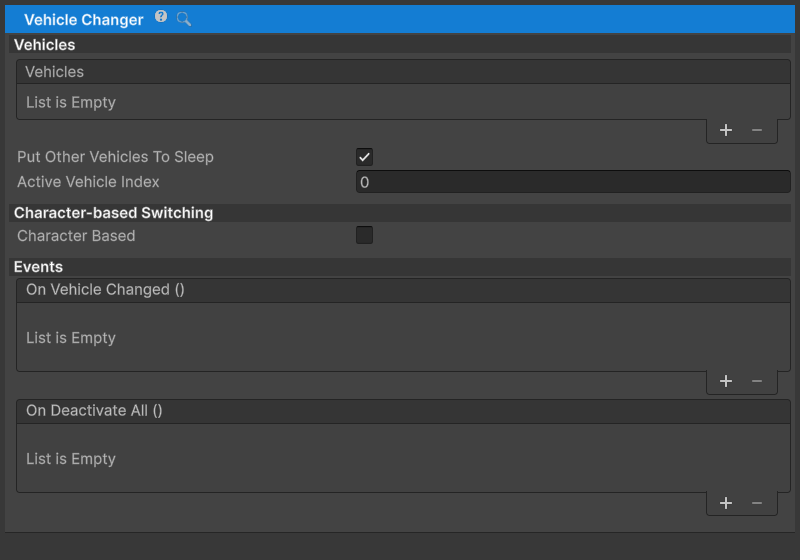
Vehicle changer is used to switch between the vehicles. It supports instant switching or character enter/exit type switching, depending on the Character Based option.
Add the vehicles to the Vehicles list. Vehicles created by a script can be registered with VehicleChanger at runtime.
Instant Vehicle Switching
- Pressing
ChangeVehicle(Input Setup) button will switch to the next vehicle inVehicleslist. When the last vehicle is reached it will wrap around and start from the first vehicle again.
Character-based Vehicle Switching
When
Character Basedswitching is enabled the only way to change the vehicle is to exit the current one (some kind of 1st or 3d person character controller is assumed), walk to the next vehicle and press theChangeVehicle(Input Setup) button.Make sure that the
Character Objectis assigned. This is a GameObject containing the character controller. The asset does not care which character controller is used as it will simply deactivate the character controller GameObject and give the control to the vehicle that is being entered.The points at which the character can enter the vehicle are set by adding empty GameObjects as children to the vehicle and tagging them with the
Enter Exit Tag, which isEnterExitPointby default. Check the demo scene vehicles for the example, e.g. the Niva has the LeftEnterExitPoint only, which means that the character can exit only from the left (driver) side. Duplicate it and move it to the right door position to make entering from the passenger side possible too.When exiting the vehicle, the character will re-appear at the position it entered. So, if it entered from the left side it will re-appear on the left side when exiting.
Put Other Vehicles To Sleep disables the unselected vehicles to save processing time. In v14, player input follows the selected vehicle even with this option off. For AI or network-controlled vehicles, disable automatic input and let their owning system supply the input states.